


Ever get annoyed by those high tire installation prices at the shop? Imagine fixing your own tires at home with just a few simple tools and a bit of know-how. In this guide, I'll take you through each step, just like checking your tires before a long, smooth drive.
It really is like warming up your engine before you hit the road, if you’re prepared, you stay in control. Once you get the hang of it, you’ll turn tire work into a hassle-free routine that saves you both time and money.
Essential Tools for a Step-by-Step Tire Installation Guide

When you’ve got the right tools, installing tires becomes a simple, safe ride, whether you’re at home or in a professional shop. A good tool kit makes it easier to lift your car and mount new tires, keeping everything smooth from start to finish. It’s a bit like checking your favorite toolkit before jumping into a project, you know you’re set up for success. For a one-stop DIY experience, head over to this link: tire installation tools.
Here's what you'll need:
- Floor jack and jack stands (make sure to use these on a flat, stable surface)
- Lug wrench or impact wrench
- Torque wrench
- Tire-changing machine with a demount head (sometimes called a Duckhead)
- Bead lubricant (helps the tire slide on easier)
- Valve-core removal/installation tool (for handling the inner valve of the tire)
- Air compressor
- Abrasive pads to smooth the rim
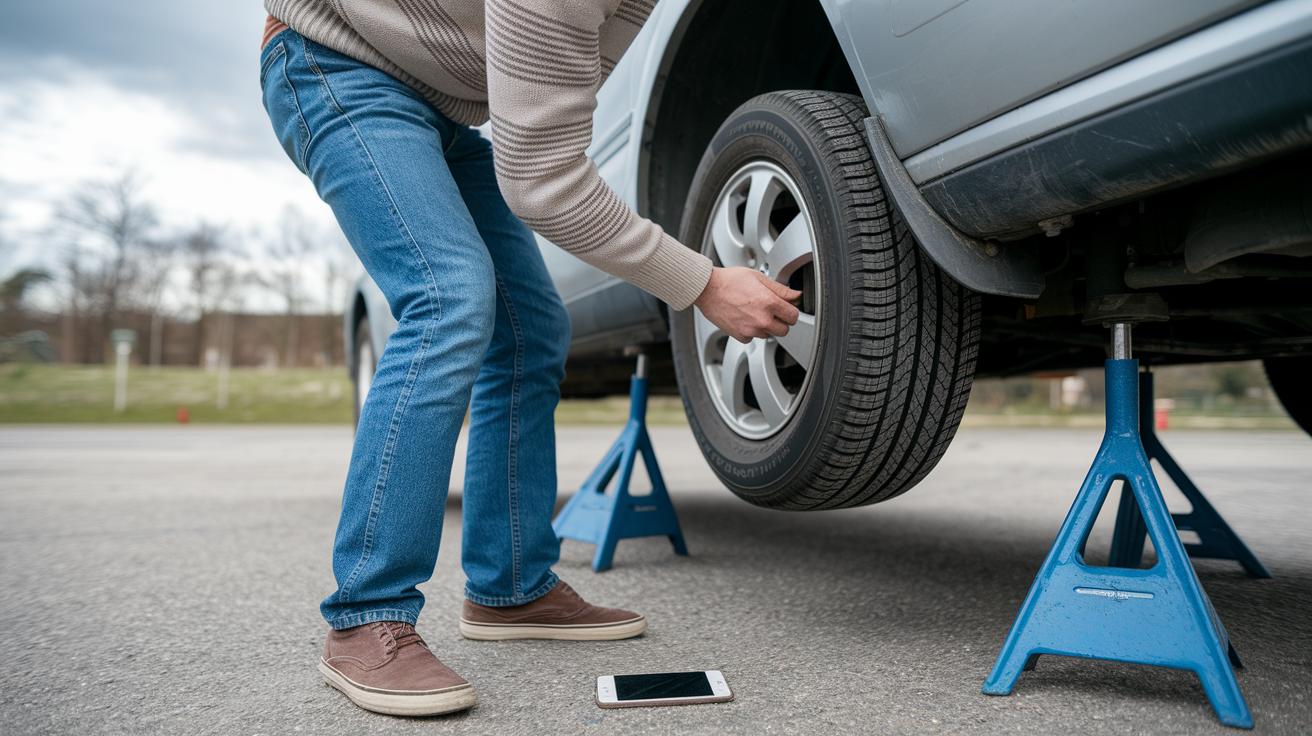
Before you start the job, set up your workspace safely. Place your floor jack under the car’s specific lift point (you can find this info in your owner’s manual) and back it up with jack stands on a solid, level surface. This setup stops any unexpected shifts when you're loosening lug nuts or taking off your tires. It’s much like making sure your car is securely parked on a slick street, safety first. Taking the time to prep properly not only keeps things steady but also makes the whole process more enjoyable and stress-free.
Step-by-Step Tire Removal in Your Installation Guide

First, set your floor jack under the car's lift point (as your manual suggests) and slowly raise the vehicle. Then, carefully place jack stands on a flat spot to keep your car secure, kind of like parking in a safe spot before you get to work.
Before you loosen any lug nuts, make sure the jack stands hold the car steady. Once everything's secure, you can start removing the tire without worrying about any sudden shifts.
- Put the floor jack under the right spot and lift the car completely off the ground.
- Set your jack stands under the car on a level surface.
- Begin loosening the lug nuts on the front left wheel, moving in a counterclockwise direction.
- Lower the wheel carefully until it gently touches the ground.
- Remove the valve stem core or pull the valve stem (this lets the air out, much like deflating a bicycle tire) so the tire is fully deflated before you take it off.
As you deflate the tire, keep the wheel resting on the ground to stay safe. Slowly unscrew the valve stem core to let the air escape steadily. This method ensures there’s no trapped air, making the process safer and smoother for the next step.
Inspecting Wheels for Your Step-by-Step Tire Installation Guide

Before you install a new tire, take a close look at your wheels to catch any problems early. It’s like giving your car a quick check-up before heading out on a long drive. This simple step helps make sure everything is safe and smooth when you’re ready to roll.
Start by checking the rim surfaces for any rust, burrs, or rough spots. Look carefully at the inside and the lip of the rim too, and use an abrasive pad (a rough cleaning tool) to smooth out any bumps. Also, inspect the valve stems and their seats for leaks – if you spot any issues, it’s best to swap them out. And don’t forget to make sure the bead seating areas stay clean and free of debris. This ensures the tire fits tightly and securely.
After these checks, spend a few extra minutes cleaning the surfaces and getting the valve stems ready. Use that abrasive pad again to fix up any tiny imperfections, so the tire can sit perfectly on the rim. Then, lightly coat the valve stem and bead seating areas with a bit of lubricant. This little step helps create a snug, leak-proof seal when the new tire is in place. Taking the time for these details really smooths the path to a better, safer ride.
Step-by-Step Mounting of New Tires: Tire Installation Guide

Getting your new tires mounted right really helps your car handle well. Start by placing the rim flat on the machine turntable, then use a hydraulic press to hold it steady. Next, add a bit of lubricant on the tire beads (the edges of the tire) and the rim. This little grease helps the tire slide into place smoothly. These steps work together to ensure your tire fits perfectly and safely.
- Place the rim flat on the machine turntable.
- Lock it in place with the hydraulic press so it doesn’t move.
- Generously apply lubricant on both the tire beads and rim surfaces.
- Use the demount head and gently press the foot pedal to break the lower bead away from the rim.
- Slowly rotate the rim so the upper bead can slide into position.
- Carefully repeat the process for the second bead, making sure it lines up evenly.
- Finally, check that the tire is centered and all edges are properly in place.
Safety is key when mounting tires. Always keep your hands well clear of any moving parts, especially near the tire beads when seating and during inflation. It’s a good idea to take a moment to step back after breaking the bead and watch carefully for any issues. This little pause helps you spot any problems early on, ensuring the tire makes a perfect airtight seal. That way, you can feel confident and enjoy a secure ride with your new tires.
Inflating and Balancing in a Step-by-Step Tire Installation Guide

Start by pumping your tire to the exact PSI the manufacturer recommends. Use an air compressor along with a gauge, and double-check that each tire is filled to the right pressure for your vehicle. This helps keep your tire strong and slows down wear.
Next, balance your tire to even out the weight. Balancing means using a machine to notice any unequal weight distribution and then adding small weights to fix it. So after you’ve inflated your tire, place the wheel on a balancer and add the correct wheel weights to smooth out any wobbling.
| Vehicle Type | Recommended PSI |
|---|---|
| Passenger Car | 32 PSI |
| SUV | 35 PSI |
| Light Truck | 40 PSI |
Once you have the tire correctly inflated and balanced, put the wheel back on your vehicle. First, hand-tighten the lug nuts, then lower your vehicle so it rests on the ground. Lastly, use a torque wrench to secure the lug nuts in a star pattern. This step spreads the pressure evenly and not only improves your vehicle’s performance but also keeps you safer by making sure the tire stays firmly attached to the wheel.
Step-by-Step Alignment and Final Checks: Tire Installation Guide

Now that your new tires are mounted and balanced, it's time to check the wheel alignment. You want to adjust the toe (the direction your tire points), camber (the tilt of the tire), and caster (the steering angle) so your car drives straight. A car with good alignment handles better and makes your tires last longer. It's like checking your bike's wheels before you set off on a long ride.
Before hitting the road, do some final safety checks to be sure everything is set. Make sure the tire pressure is right, lug nuts are tightened evenly, and valve stems are secure without any air leaks. These simple steps help keep you and your ride safe, giving you confidence every time you drive.
- Check tire pressure with a gauge and adjust to the right PSI.
- Tighten lug nuts in a star pattern so they share the pressure evenly.
- Make sure valve stems are snug and leak-free.
- Look over the alignment settings, including toe, camber, and caster.
- Confirm the tire bead is fully seated on the rim to create a tight seal.
Safety Checklist for Step-by-Step Tire Installation Guide
When you’re getting ready to work on your tire installation, keeping safe is key. It helps you look after both yourself and your car. Let’s walk through some simple steps to make sure your workspace is secure and you avoid any accidents.
- Make sure your car is parked on flat ground and that you’ve set the parking brake.
- Always back up the jack with sturdy jack stands that are made for your car; the jack alone isn’t enough.
- Keep your hands and fingers clear of any moving parts or tire beads (the thick edges of the tire).
- Tighten the lug nuts to the car maker’s recommended settings using a star pattern.
- Check the tire pressure, look at the tread (the tire’s surface that touches the road), and make sure the wheel is firmly in place before you drive off.
- Rotate your tires every 5,000 to 7,000 miles to help them wear evenly.
- Keep your work area neat so you can move around safely while working on your car.
Also, get rid of old tires the right way by following your local recycling rules, this helps protect the environment. It’s a smart idea to schedule regular checks for your tires too. Keeping an eye on them means you can catch signs of wear early and keep your ride smooth and safe.
Final Words
In the action, we covered the basics for a smooth tire swap, from gathering the right tools and safely lifting your car to inspecting rims, mounting new tires, inflating, balancing, and even aligning wheels for top performance. Each step was explained clearly, so you know what to expect when following this step-by-step tire installation guide. The breakdown makes it easy, practical, and safe for anyone ready to get hands-on. Keep these tips in mind as you work and enjoy a safer, smoother ride on every trip.
FAQ
What is the 3% rule for tires?
The 3% rule for tires means you should check your tires once you notice a 3% reduction in tread. This simple guideline helps catch early wear and keep your ride safe.
How to properly install tires?
Properly installing tires means using the right tools—like a jack, jack stands, lug and torque wrenches—and following a clear, safe step-by-step procedure to ensure a secure fit and reliable performance.
What are the 10 steps in changing a tire?
The 10 steps in changing a tire cover safety prep, loosening lug nuts, lifting the car, removing the tire, deflating it, switching to a spare or repaired tire, reattaching bolts, torqueing them, lowering the car, and doing a final check.
Can you mount tires without balancing?
Mounting tires without balancing means you can install them, but skipping balance may lead to vibrations and uneven wear. Balancing your tires ensures smoother, more reliable driving.
