


Ever thought about swapping out your tires without paying a pricey shop visit? You might find that installing them yourself is actually pretty simple. With a few basic tools and a clear, easy-to-follow plan, you can save money and handle this task on your own.
We'll walk you through everything, from checking for any issues (like small defects that could affect your ride) to safely lifting your car. It’s like following a map on a relaxed drive.
Ready to take on this easy fix and keep rolling smoothly? Let's get started.
DIYers’ Complete Tire Installation Process Overview

When you're getting ready to install your tires at home, it's smart to take it step by step. Did you know many first-timers often skip checking their new wheels for defects? Always start by looking over your wheels and tires for any signs of damage. If you notice something off, call support right away at 320-247-6160.
Next, grab all the tools you’ll need. You’ll want your lug wrench, jack, torque wrench, and even a set of valve stem tools handy. Sometimes even a valve cap comes with a built-in tool to help release air smoothly. Getting all these ready and working on a flat surface keeps things safe and simple.
Before lifting your car, slightly loosen the lug nuts to keep the wheel steady. Then, carefully use your jack to raise the vehicle so you’re working on a level spot. Imagine checking each step off a simple list on your phone, it makes the process feel more like a friendly pit stop than a chore.
For more detailed guidance, visit tityres.com for extra tips and advice on doing your tire installation at home. Enjoy the process and know that taking your time to prepare means you’ll end up with a smooth, stress-free ride.
Essential Tools for Tire Installation Tips for DIYers

Before you start, make sure your workspace is safe and clear. First, gather the basic tools you need. You’ll want a strong jack to lift your car without any risk, a lug wrench to get those stubborn lug nuts off, and a torque wrench to check that your lug nuts are tightened just right (this tool helps you avoid both loose and over-tightened nuts). Don’t forget your valve stem tools too, they help you with the valve, and some valve caps even let you quickly release air if needed.
It’s a good idea to inspect your gear before you begin. Check that your jack is stable and not leaking, and look over your lug and torque wrenches for any wear or damage. Keeping your valve stem tools clean ensures they work when you need them most.
Start each tire change by giving your tools a quick once-over. A simple check can save you from unexpected hassles on the road.
Here’s what you’ll need:
- Jack
- Lug wrench
- Torque wrench
- Valve stem tools (some even come with a built-in deflation tool)
For more details on the full range of tire installation tools, visit tire installation tools.
Step-by-Step DIY Tire Installation Guide

Before you start, imagine following a friendly road map. Each step in this process is like a clear sign guiding you safely along. We’ve put together a simple, easy-to-follow plan to help you replace your tire confidently.
First, take a little air out of the tire by removing the valve core with a slot tool. This drops the pressure, making the tire easier to work with – kind of like letting a bit of air out of a bike tire before a smooth turn.
Next, while the tire still touches the ground, gently loosen the lug nuts. The car’s weight stops the wheel from turning, so you don’t have to battle a spinning wheel. A quick twist is all it takes before you really get going.
Then, raise your car safely using a jack and secure it with jack stands. It’s super important that the vehicle is stable before you remove the tire. A solid lift means you can work without any surprises.
After that, completely remove the lug nuts and take the old tire off. Carefully set aside each nut and the old tire so you know what to dispose of or recycle later. Doing it neatly helps protect the wheel and gets you ready for the new tire.
Now, go ahead and mount the new tire onto the rim. Make sure the tire bead (the edge that seals the tire to the rim) sits snugly in place. A good seat means your tire is properly aligned for a safe ride.
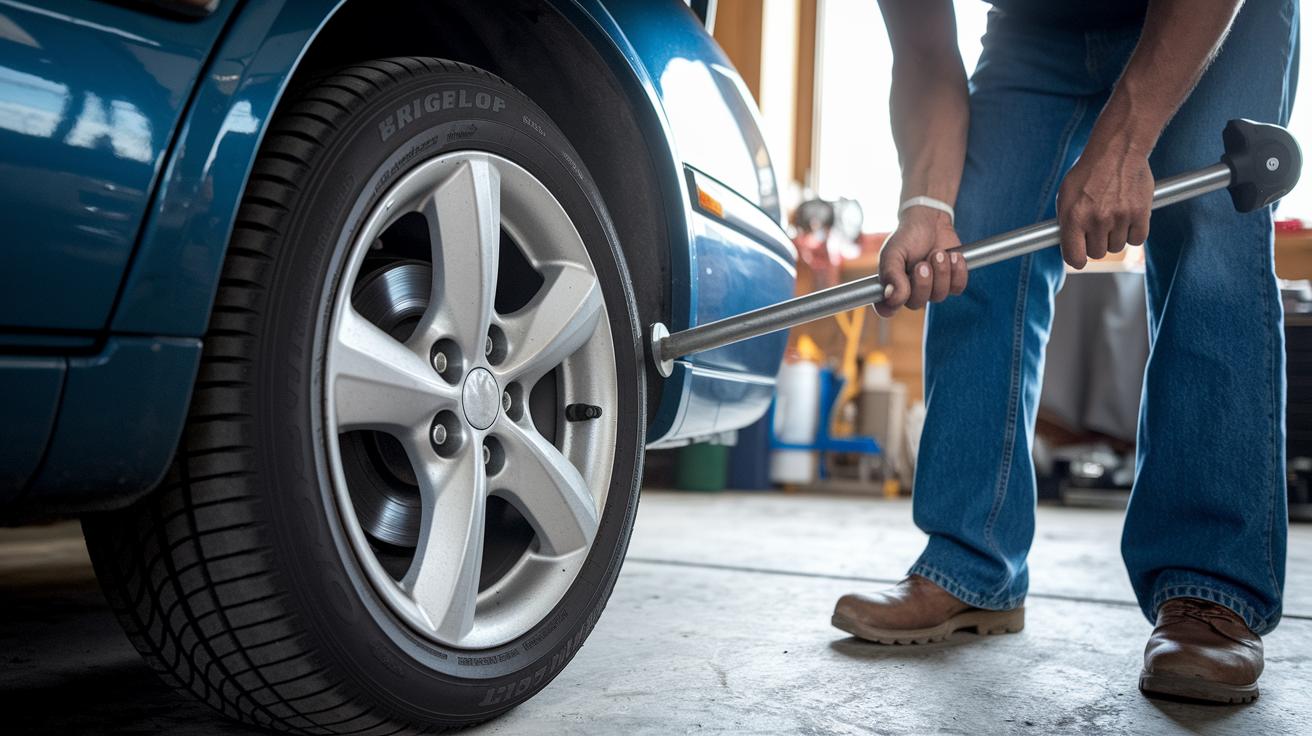
Once the new tire is on, hand-tighten the lug nuts using a star pattern. This method spreads the pressure evenly around the wheel, much like arranging puzzle pieces without forcing them.
Finally, lower the vehicle back down and use a torque wrench to tighten the lug nuts to the manufacturer’s instructions. Checking the torque ensures the tire is locked in place securely, reducing any vibrations when you hit the road.
Following these steps makes DIY tire replacement simple, safe, and even a bit fun. Enjoy the ride!
Safety Precautions and Best Practices for DIY Tire Installation

Slip on your gloves and safety glasses first, just like buckling up in a car, these protect your hands and eyes when surprises pop up. Always work on a flat, level surface and set wheel chocks firmly around the tires to stop any rolling. Think of those chocks like tying your shoelaces tight before a sprint.
Before you lift the car, check your jack and jack stands to make sure they’re solid and in the right spot. Don’t rely on the jack alone; the jack stands hold the vehicle safely, kind of like resting a heavy box on a sturdy table. It’s all about keeping things balanced.
Keep your work area neat and bright so you can easily spot any hazards. Make sure all your tools, like the lug wrench and torque wrench, are in good shape. Giving them a once-over is like checking your headlights before a night drive. And remember, never work under your vehicle without proper supports. Safety always comes first.
Troubleshooting Common Tire Installation Errors for DIYers
Sometimes, even when you think you've done everything right, you might run into a few hiccups like loose lug nuts, an uneven tire bead (that’s where the tire sits on the rim), or a tire that wobbles strangely once you're driving. You might notice a little vibration or an odd sound when you're on the road. It's a good idea to double-check your work if anything seems off.
First off, take a look at your lug nuts. If they're a bit loose, they could be the reason behind that wobble. If you feel any play, grab a torque wrench and tighten them in a star pattern. It’s a simple trick that often does the job.
Next, check the tire bead, the edge where your tire meets the rim. Sometimes it might not sit evenly, which could be causing the issue. A little bit of lubricant on the bead can help it settle just right. Think of it like adding a drop of oil for a smoother, more relaxed ride.
Also, don't forget to make sure your wheel is balanced. An unbalanced tire can cause vibrations and even some extra noise. When your car is on a lift, take a look at the tire to see if anything is stuck or out of place.
- Check that your lug nuts are tight.
- Re-seat the tire bead using a small bit of lubricant.
- Look closely at the tire balance.
Regular checks after installing your tires help keep your ride safe and sure, letting you enjoy the journey without any unwanted surprises.
Cost Considerations and Time-Saving Hacks in Home Tire Installation

When you're working on installing tires at home, keeping costs low and work quick is really important. Many folks save about $50 to $100 per job by picking budget-friendly tools, which is a pretty neat trick.
Instead of buying every tool you need, consider renting a jack and a torque wrench (a tool that helps you tighten bolts just right) for just one use. This simple switch keeps your expenses down and still makes sure you have the right tools when you need them.
Before you dive in, try sorting your lug nuts by size and type. This little tip works like a mini pit stop, saving time and preventing mixing up the nuts when you're on the wheel.
A cordless impact wrench can also be a real time-saver. Use it for the initial steps, but finish tightening by hand to get the perfect torque (ensuring everything is safe and secure). Remember, too much power early on might lead to over-tightening, and that’s a risk you want to avoid.
Choosing low-cost tire tools that still meet safety checks is a smart move, too. Check your local rental options or look for reliable, budget-friendly gear. This way, you finish your project efficiently without ever compromising on safety.
Post-Installation Checks and Maintenance Tips for DIYers

Once you’ve finished putting on your new tires, remember that you’re not done yet. Your journey really begins once you hit the road. After driving about 50 to 100 miles, take a moment to check that your lug nuts (the bolts holding your wheels) are still nice and tight. Think of it as a quick tune-up to make sure everything is secure.
Also, keep an eye out for any leaks or uneven wear. After your first drive, a brief look over your tires can catch small issues early, just like checking your windshield for smudges. It only takes a minute, but it can save you from bigger hassles later on.
Pay attention while driving for any vibrations or odd noises. If your ride starts feeling off, it might be a sign that your wheel balance or tire alignment needs a closer look. It’s your car’s way of whispering, “Hey, something’s not quite right.”
And don’t forget to rotate your tires every 5,000 miles. This simple routine helps your tires wear evenly and can make them last longer. By following these tips, you can enjoy a safer drive and a smoother ride every time you’re on the road.
FAQs on Tire Installation Tips for DIYers

When checking your rims, take a close look at each one for any cracks, dents, or odd wear. Grab a flashlight and shine it along where the tire meets the rim. You want to see a smooth surface without any chips that might stop the tire from sitting right.
For checking your valve, simply remove the valve cap and inspect it carefully. Look for any damage or missing parts (seals) that could affect how it works. A good valve should click back into place firmly. If it feels off, it might be a good idea to replace it to keep your tire pressure steady.
After you’ve mounted your tire, it’s important to double-check the lug nuts. Use a torque wrench to ensure each lug nut is tightened evenly, just as the manufacturer recommends. This step is key for a secure and safe fit.
To see if your wheel is properly lined up, try a simple test at home. Use a piece of string or even some cardboard and line it along the edge of the wheel. This will help you tell if the tire is sitting straight.
- Inspect rims for damage
- Verify valve condition
- Re-check lug nut tightness
- Test alignment with string or cardboard
Final Words
In the action, we covered a clear DIY car tire installation process from essential tool selection to careful step-by-step guidance. We talked about safety precautions and troubleshooting common mounting errors while sharing cost-saving hacks and post-installation checks. Each part was designed to help you feel confident and safe on the road. Keep these tire installation tips for DIYers in mind as you work on your vehicle, and enjoy the peace of mind that comes with doing it right.
FAQ
Tire installation tips for DIYers often discussed on Reddit, homemade tips, and best advice
Tire installation tips for DIYers emphasize using proper tools, inspecting tires and rims for defects, and following step-by-step instructions. These tips help make tire changes safe and efficient.
How to make tire mounting lubricant, tire mounting paste, and what are the alternatives
Tire mounting lubricant advice explains that mounting paste eases tire bead seating. While some DIYers mix their own formulas, it’s best to use products made for tire installation to avoid damaging components.
How to balance a tire on a machine and ideas for a DIY tire balancer
Tire balancing guidance covers using a proper machine or tools for even weight distribution. Correct balance reduces vibrations and ensures smooth driving, so follow recommended methods closely.
What is the 3% rule for tires
The 3% rule for tires refers to maintaining consistent spacing between the tire bead and rim. This guideline helps ensure an even seal and secure fit during installation.
Is it easy to put tires on yourself
DIY tire installation can be straightforward with the right tools, clear instructions, and solid safety practices. Confidence grows with experience and careful adherence to each step.
Can you use WD-40 to bead a tire
Using WD-40 to bead a tire is not advised. Instead, use a tire mounting lubricant designed for the job, as it protects tire components and ensures proper bead seating.
What is a good practice to do when installing new tires
A good practice when installing new tires is to start by inspecting wheels, hand-tightening lug nuts in a star pattern, and then re-torqueing them after a short drive to confirm a secure fit.
