


Ever had that moment when your tire sensor light suddenly pops on? It can be pretty surprising, right? Here’s a simple way to check those alerts and get things back to smooth sailing.
Start by using your TPMS tool (that’s your tire pressure monitoring system, which keeps an eye on your tire pressure for you). Then take a moment to manually check your tire pressure, much like you’d follow clear street signs on your way.
This step-by-step guide makes the whole process as clear as a well-marked route. Trust me, once you're done, your ride will feel safer and your mind a lot lighter.
Step-by-Step Tire Sensor Diagnostics Guide

When it comes to checking your tire sensors, having a clear plan keeps you safe and avoids mix-ups. Let’s walk through some simple steps to make sure your sensors are working well and your tires stay safe.
-
Start by grabbing your TPMS diagnostic tool and run an initial scan. This handy tool picks up odd sensor signals, like a warning light that flashes for about 60 to 90 seconds.
-
Next, check your tire pressure manually using a calibrated gauge. Compare what you read with the manufacturer’s recommended cold tire pressure (the pressure when your tires haven’t been driven on and are still cool) to be sure they’re pumped just right.
-
Now, take a look at how the sensor light acts. If it stays on or flashes in a strange way, it might mean the sensor is damaged or the battery inside it is getting weak.
-
Keep in mind that temperature can change those readings. Tire pressure can shift by about 1 psi for every 10°F drop, so a little change now and then is normal.
-
Then, use an OBD scanner to clear out any stored diagnostic codes. Wiping the slate clean helps you see current issues without confusion from old codes.
-
Check the sensor’s battery health and its casing. A good battery usually lasts anywhere between 5 and 10 years, and any signs of corrosion or moisture might point to problems ahead.
-
Follow your vehicle’s guide for relearning the sensors through a specific drive cycle. This step helps sync the sensors with your car’s control unit, making sure they all work together perfectly.
-
Lastly, double-check the installation torque and ensure your tires are securely in place. Proper mounting makes sure the sensors provide accurate pressure data.
If that warning light still sticks around after these steps, it might be a sign of a bigger problem that needs a pro’s attention. And always remember to manually verify the tire pressure before trying any further fixes – keeping you and your ride safe is what really matters.
Essential Tools for Tire Sensor Diagnostics Guide

Having the right equipment is super important for good tire sensor checks. TPMS sensors (those battery-powered sensors found in tire valve stems or rims) need tools that are spot-on so you avoid misreads that could even put you at risk on the road. With the correct gear, you can catch sensor issues early, making sure your readings are accurate and your tires give you the best performance. Choosing the right diagnostic tools really means fewer mistakes and a safer drive.
A TPMS-friendly OBD-II scanner, like the ANCEL DS600 BT, really comes in handy because it reads sensor codes and checks sensor IDs. You'll also want a precise tire pressure gauge to make sure your tire pressure matches the manufacturer's recommended cold pressure. A valve stem removal tool lets you take out sensors safely without causing damage. On top of that, a torque wrench set to the proper specs helps secure a solid installation, and a drive cycle chart from the manufacturer guides the relearn process. And remember, a clean, dry cloth is great for checking sensor housings for any rust or dirt.
Make sure to take care of your tools by calibrating them as recommended and checking for any wear before each use. Tips and guides on troubleshooting common smart tire issues can really help when you're picking a scanner and avoiding typical missteps. Keeping these tools in a dry place will help preserve their accuracy and give them a longer life.
Identifying Common TPMS Error Codes in Tire Sensor Diagnostics Guide

Modern cars keep track of all sorts of codes, and the sensor lights give you clear hints. If you see a light blinking for about 60 to 90 seconds, it usually means there's just a small, temporary problem. But if that light stays on without blinking, it signals a more serious issue. This helps you spot problems like a low sensor battery (or a weak signal) or the sensor not being recognized by the system. Knowing what these codes mean can steer you toward the right fix.
| Error Code | Likely Cause | Recommended Action |
|---|---|---|
| P0451 | Sensor battery is low | Replace the sensor or its battery |
| P0452 | Weak sensor signal or frequency mismatch | Inspect installation and check for ECU interference |
| P0453 | Sensor not learned by the system | Run the sensor relearn process |
Always check your vehicle’s service manual to be sure you’re taking the right steps to fix the issue.
Tire Sensor Diagnostics Guide: Quick & Easy Fix

When the temperature drops, sensor readings can change too. If you see the tire pressure go down by about 1 psi for every 10°F drop, don't worry, that's normal. But if your sensor's battery voltage dips below about 2.7 V, the sensor might not work as well. For example, if your tire normally sits at around 32 psi but suddenly shows lower values along with a voltage drop, it might be time to check that battery before you head out.
Sometimes, strange readings happen because of interference. You might notice the sensor losing its signal now and then because of things like metal coatings or moisture around the valve stem. And if you see sudden jumps in pressure, it could mean the sensor's diaphragm is damaged. If your readings are all over the place or you see no signal, take a little peek at how the sensor is set up. Make sure it’s sitting right and that there aren’t any issues with the ECU’s frequency settings.
TPMS Sensor Calibration & Relearning Procedures in Tire Sensor Diagnostics Guide

After you get your tires serviced, you’ll want to update your TPMS sensors. This update makes sure your car’s computer knows exactly which sensor is where so that your tire pressure readings stay accurate and you don’t get any false alerts.
For a stationary relearn, start by finding the reset button under your dashboard. When you press it, the sensors begin updating while you sit tight in your car. Next, take a gentle drive at about 8 to 16 mph for 5 to 10 minutes. This slow drive gives the sensors time to reassign their numbers properly. So, after a tire change, press the button and take a short drive until the sensor light adjusts and syncs with your vehicle.
Another method is the OBD learn. You connect a special TPMS tool to your car’s OBD-II port (a plug-in point that lets you connect diagnostic devices). This handy tool talks to your car’s computer and writes the sensor numbers directly. It usually only takes a few minutes, making it a great option when you replace the sensors. Picture hooking up your scanner, selecting the “ID write” option, and watching as the display confirms everything is set correctly.
With the auto-learn method, simply turn your steering wheel fully to the left and then to the right while driving slowly. This helps the sensors automatically detect and assign their correct spots based on the wheel movement. To be sure the update worked, check the live data on your diagnostic tool to make sure each sensor’s ID matches the right wheel.
Advanced Diagnostic Techniques in Tire Sensor Diagnostics Guide
When basic tests just aren’t doing the trick and your tire sensors are still acting up, it’s time to dig deeper with advanced checks. These methods help you take a closer look at the sensor circuits and how they handle signals so you can understand weird readings and spot problems quickly.
Circuit Continuity & Voltage Testing
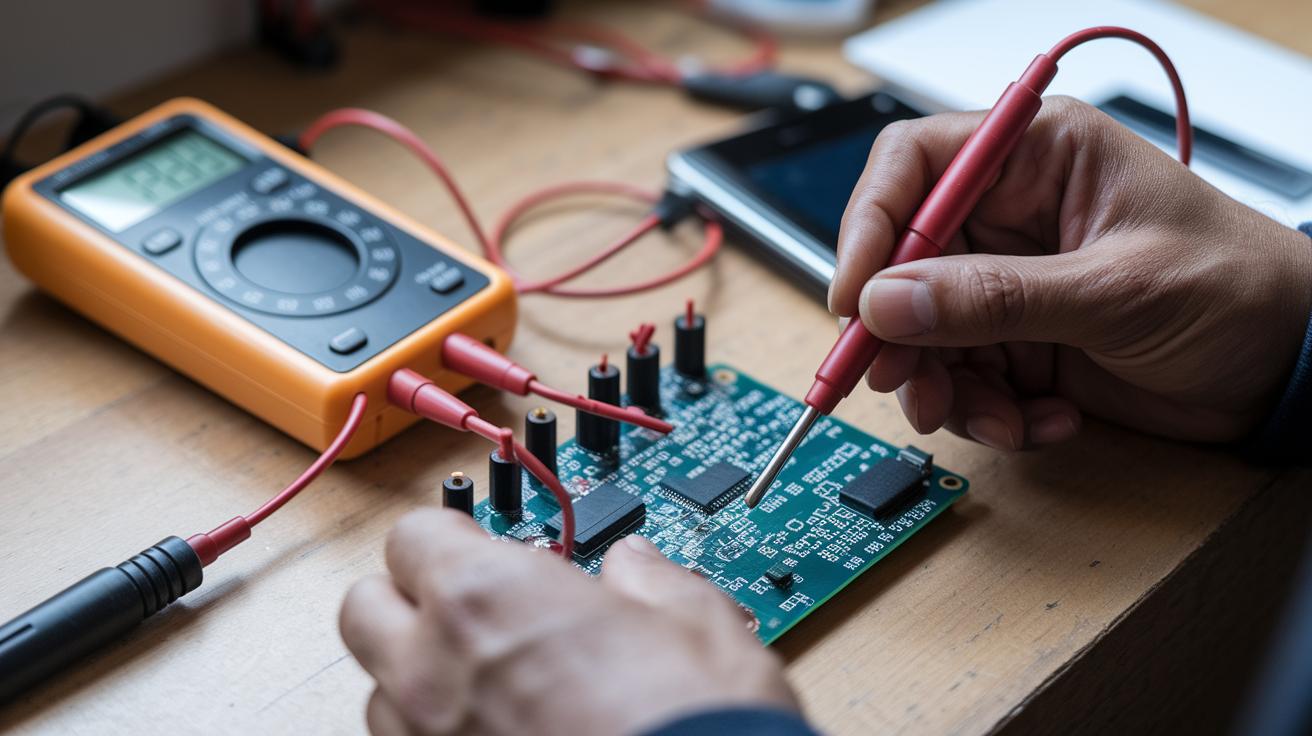
Start by using a digital multimeter to check each sensor’s circuit. You want to measure the battery voltage while the sensor is working, ideally, it should be between 2.7 and 3.3 volts. If it drops below that range, it could mean the sensor’s battery is failing. Next, run a continuity test to check for any breaks in the wiring or open coils (parts of the circuit that should be connected). A normal reading here means the sensor’s circuit isn’t broken and is working as expected.
RF Signal Analysis
Next up, if you think interference might be causing issues, try using an RF spectrum analyzer along with a special meter that checks RF signal strength. This tool looks at signals in the 315/433 MHz range to help you see if radio interference is messing with your sensor readings. Sometimes, you might also use an oscilloscope to capture the sensor’s pressure-to-voltage waveform (the graph that shows how the sensor converts pressure into an electrical signal). For extra tips on handling RF interference, check out the detailed guide at tityres.com.
Preventative Maintenance & Professional Assistance in Tire Sensor Diagnostics Guide

Every 5,000 to 7,000 miles during your tire rotations, give your tire sensors a quick look-over. A little routine care goes a long way, use isopropyl alcohol to gently clean the valve seats and o-rings (the small rings that help seal the valves) to keep rust and corrosion away. If you notice that the sensor battery is over five years old or its voltage drops below 2.7 volts, it’s time for a replacement. After any tire service, run a relearn cycle so that your car’s computer and the sensors can sync up properly; think of it like making sure your favorite playlist is set right before a long drive.
Sticking to this regular tire maintenance routine not only helps keep the sensors working well but also ensures you get reliable tire pressure readings, essential for a safe journey. Ever notice how much smoother everything feels when things are in tune?
If that warning light continues to blink even after you’ve done a manual pressure check and the relearn cycle, it might be time to bring in the experts. A faulty TPMS (Tire Pressure Monitoring System) can make your drive less safe, leading to problems like lower fuel efficiency or uneven tire wear. In these cases, a technician can do a detailed scan to check for deeper issues in the TPMS control unit or the sensor installation.
Taking care of your tire sensors is key to keeping your ride safe and hassle-free. Quick fixes and regular checks now can prevent bigger headaches later, keeping you on the road and in line with safety standards.
Final Words
In the action, you’ve explored a step-by-step process for checking tire sensor issues. This tire sensor diagnostics guide covered everything from initial scans to understanding error codes and sensor data quirks.
Each section stressed the need to use the right tools and follow proper calibration and maintenance steps. Remember, a regular check of your tire pressures and sensors helps keep your ride safe. Stay informed, keep your equipment sharp, and enjoy the confidence of a reliable drive.
FAQ
What is the tire sensor diagnostics guide for Ford and Chevy?
The guide for Ford and Chevy explains a clear set of steps for checking sensor signals, battery levels, and installation issues. It helps drivers safely review sensor performance on their vehicles.
What is a TPMS diagnostic tool?
A TPMS diagnostic tool scans your tire pressure system, reading sensor data and error codes. It provides quick insights that help you identify whether a sensor needs attention or replacement.
What is a free TPMS sensor check?
A free TPMS sensor check is a no-cost service that quickly reviews your tire sensor’s function using a basic scanning device. It highlights obvious problems before you invest in repairs.
How do I check or test a TPMS sensor with a multimeter?
Checking a TPMS sensor with a multimeter involves measuring battery voltage (usually between 2.7-3.3V) and circuit continuity. This test gives a clear idea of sensor health and functionality.
How can I tell which TPMS sensor is bad without a scanner?
Determining a faulty sensor without a scanner means manually comparing tire pressures and looking out for erratic sensor signals or warning light patterns, which suggest that one sensor isn’t performing as expected.
How do I reset or program my TPMS sensors, and can an OBD2 scanner help?
Resetting and programming often uses an OBD2 scanner to clear error codes and reprogram sensor IDs after tire service. This process realigns the sensors with your vehicle’s monitoring system.
What are the two most common mechanical TPMS sensor problems?
The most common issues include a dying sensor battery and physical damage to the sensor’s casing or wiring. Both affect the sensor’s reliability and can trigger a warning light.
Why is my TPMS light on when my tires appear fine?
A TPMS light may stay on even when tire pressure is normal due to battery weakness, signal issues, or minor sensor faults. It signals the need for a closer look at your sensor system.
